Want to apply the updates from ADB? This can be the tricky part for anyone not much of a techie, but if done correctly you can easily apply the updates from ADB.
ADB method is the manual way of applying the update to the device. Generally, the updates on Android are applied through OTA, but that’s not always possible especially if the update is not released for your phone or if your phone is stuck in some boot loop.
OTA updates are released in batches and your phone might not get it as soon as they are released, but with ADB, you can install the update just as they are released. Not only this, but the ADB method can help you bypass boot loop issues by applying updates or patches.
But how to apply the update from ADB? ADB method works on all Android devices, but you need the correct update files and the ADB commands to go ahead with it. Worry not if you are new to this; this article will guide you on how you can get updates from ADB.
What is ADB and How It Works?
ADB stands for Android Debug Bridge. It is a command-line tool that can be used to establish a connection between your PC and your Android Device. ADB tools are mostly used by developers for testing their apps, or to sideload some custom ROMs. In general, ADB can help you apply updates on your device, uninstall the app, push some files to your device, and even debug some issues.
But how does ADB work? To use ADB, you need to establish a successful connection between your device. This can be done in two ways, i.e., through a USB cable or a wireless connection. Connection through USB is the easier method, as you just have to enable USB debugging on your device and connect your phone to your PC through the USB cable.
Once that is done, you will have to start the ADB server on your PC; for this, you need SDK tools on the system you are using. Once you start the ADB servers and it recognizes your Android phone, you can use ADB commands to communicate with your phone via your PC.
Prerequisites To Apply Update From ADB
There are a few things that you need to fulfill before you can apply update from ADB, such as:
- Ensure your phone is charged up to 80% before you begin.
- You must have the original USB cable, or USB cable from some known brands.
- A PC is required for the process. ADB works on all systems including Linux, Mac, and Windows, so any PC will work.
- You will also need SDK tools on your system. If you don’t have them already then we will guide you on how you can get them.
- Next, you also need the update file. You can either get it from the official site or from a reputed third-party source.
How to Apply Update From ADB?
Updating from ADB isn’t straightforward like getting the OTA updates. You need to connect your phone to your PC, establish ADB connection, get the correct update files, and then install the update. But before you continue, ensure you have a backup of all the data on your phone. The steps given below will guide you on how you can apply update from ADB:
1. Get SDK Platform Tools
The first thing you need to continue with the process is the SDK Platform tools. Here’s how you can download them:
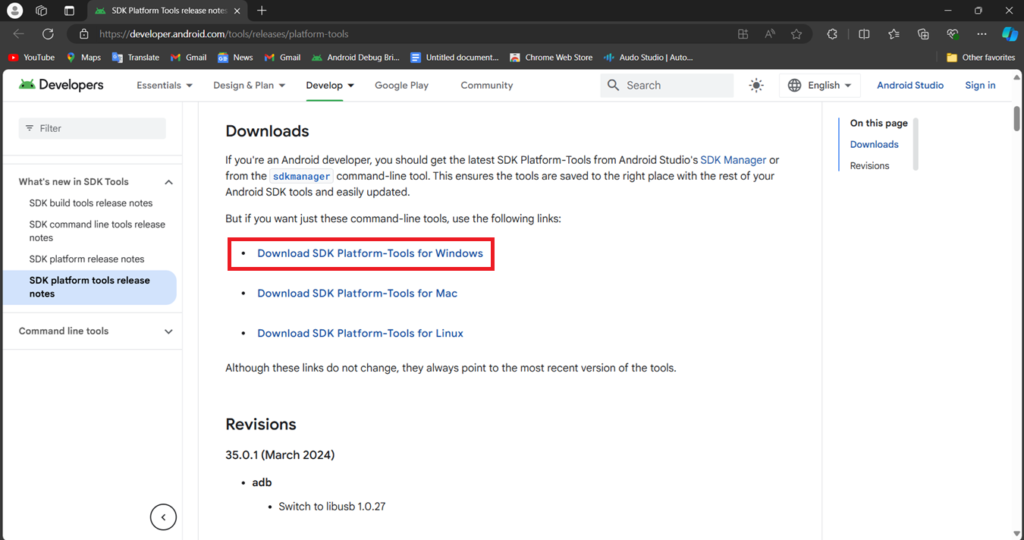
- Head over to the official SDK Platform Tools release notes page.
- Scroll down to the Downloads section, and you will see three download links for Windows, Mac, and Linux.
- If you are using Windows, then click on Download SDK Platform-Tools for Windows. For other platforms, you will have to use the other links.
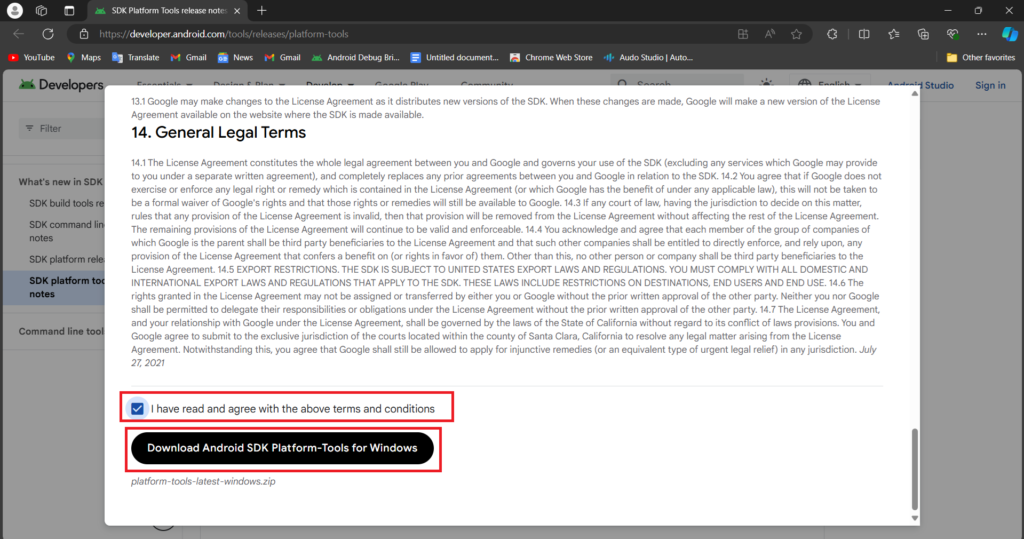
- On the pop-up screen, scroll down and check the checkbox to agree to the terms and conditions.
- Now, click on Download Android SDK Platform-Tools for Windows to download them.
- Once downloaded, press the Windows + E key to launch File Explorer and head to the Downloads folder from the left pane.
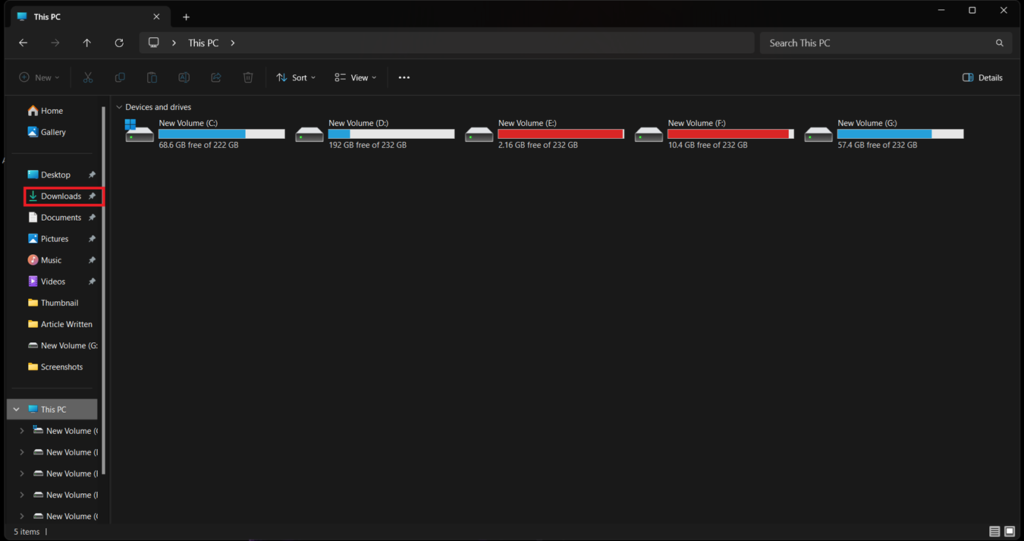
Right-click on the download SDK Platform Tools file and click on Extract All.
- Click on Extract to extract the tools.
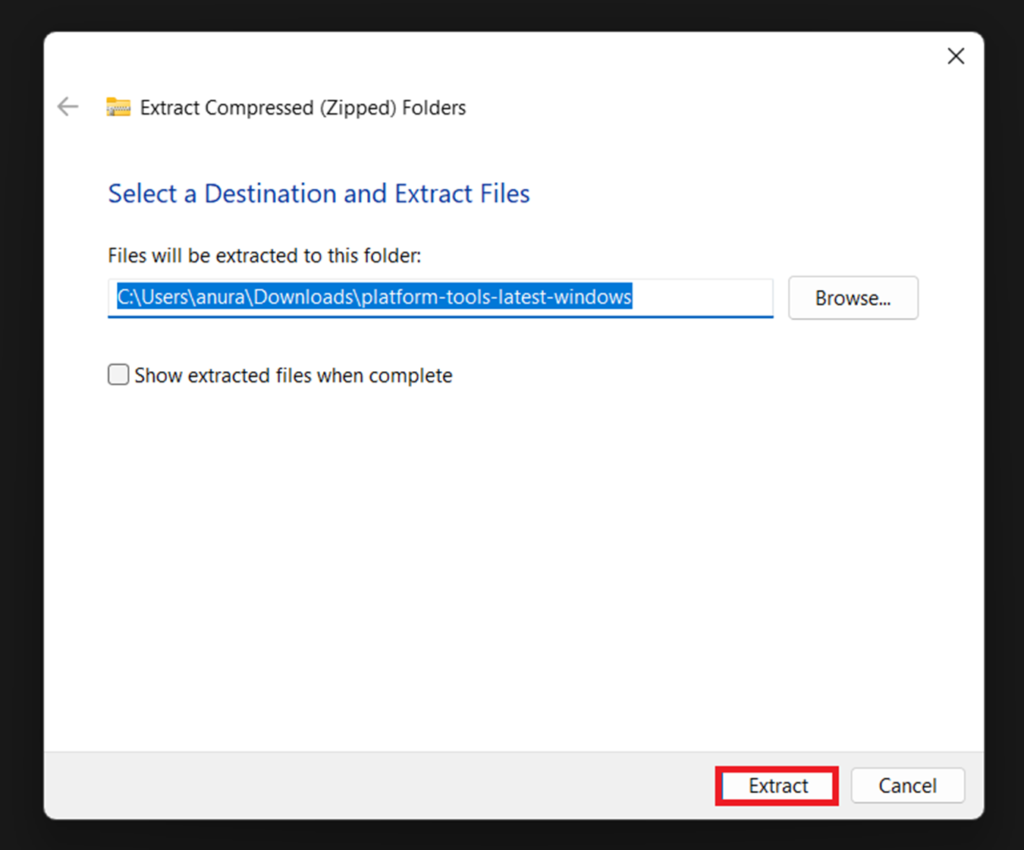
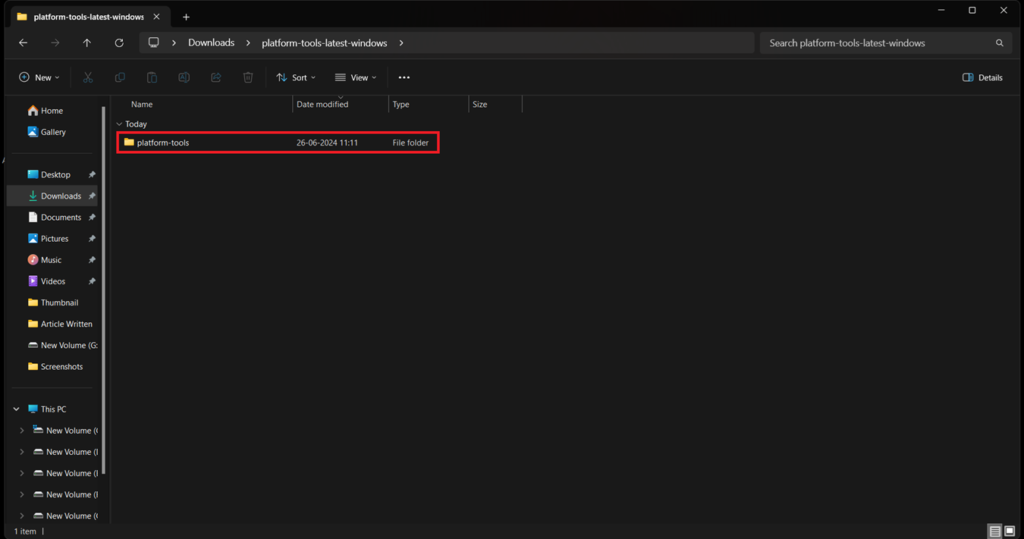
Open the extracted folder and you will see a new folder named platform-tools. Move this folder to your Desktop.
2. Enable USB Debugging
You need to enable the USB debugging option on your phone so that you can send ADB commands from your PC to your phone. You can enable USB debugging from the Developer Options. Follow the steps given below to do so:
- Open the Settings app on your phone.
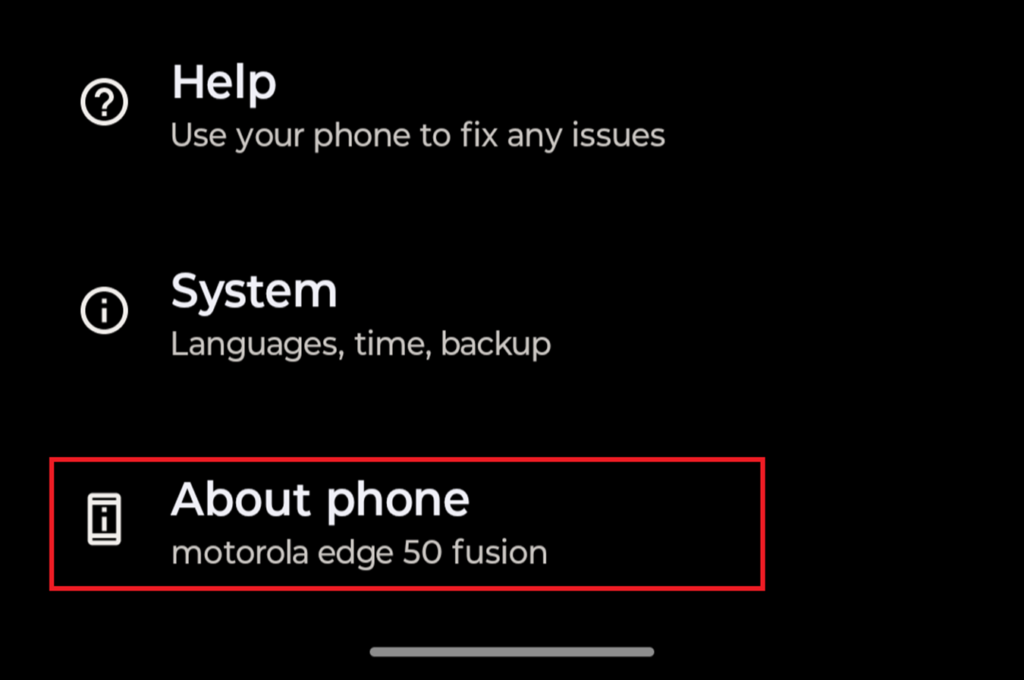
- Scroll down to the bottom of the Settings page and tap on the About Phone option.
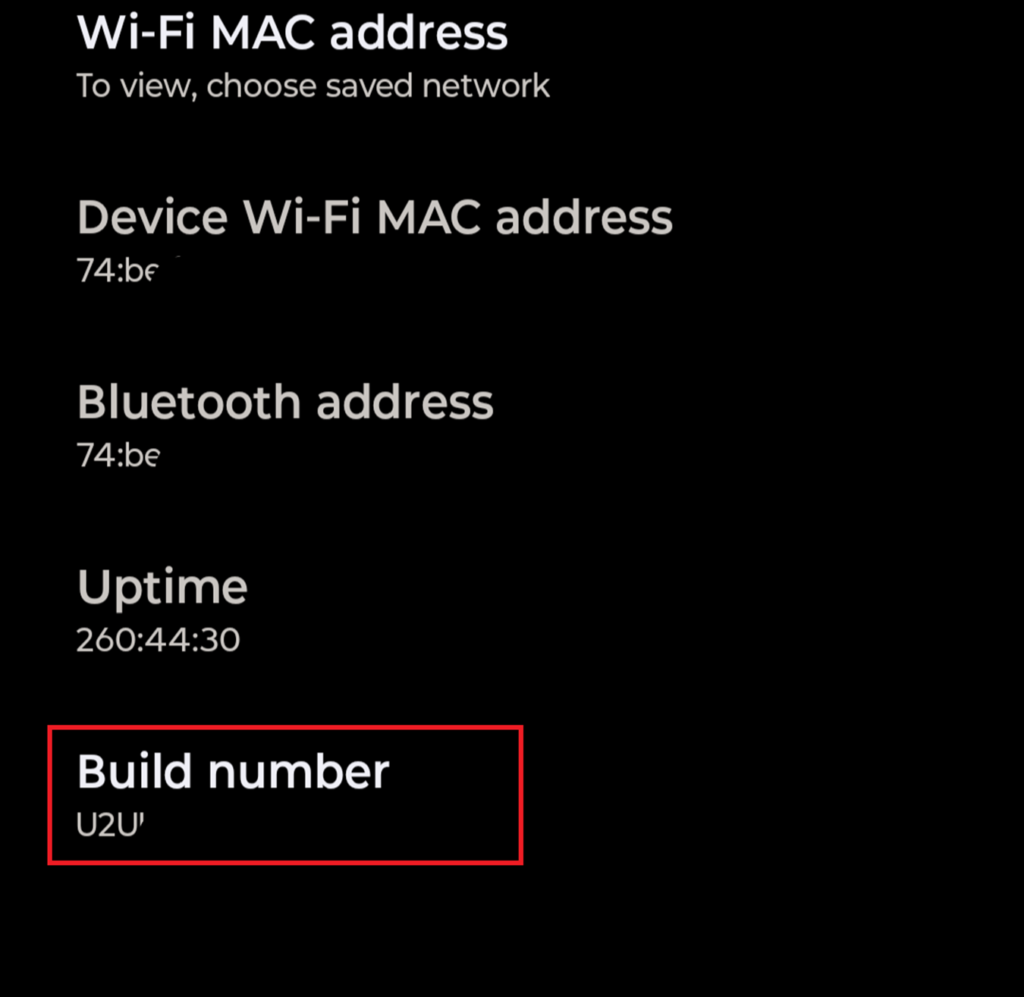
- Look for Build Number and tap on it 5-6 times consecutively until you are asked to enter your device’s PIN.
- Enter your device PIN and you will see a toast at the bottom saying ‘You are now a developer!’ indicating Developer Options are now enabled.
- Head back to the main Settings screen and tap on the System option.
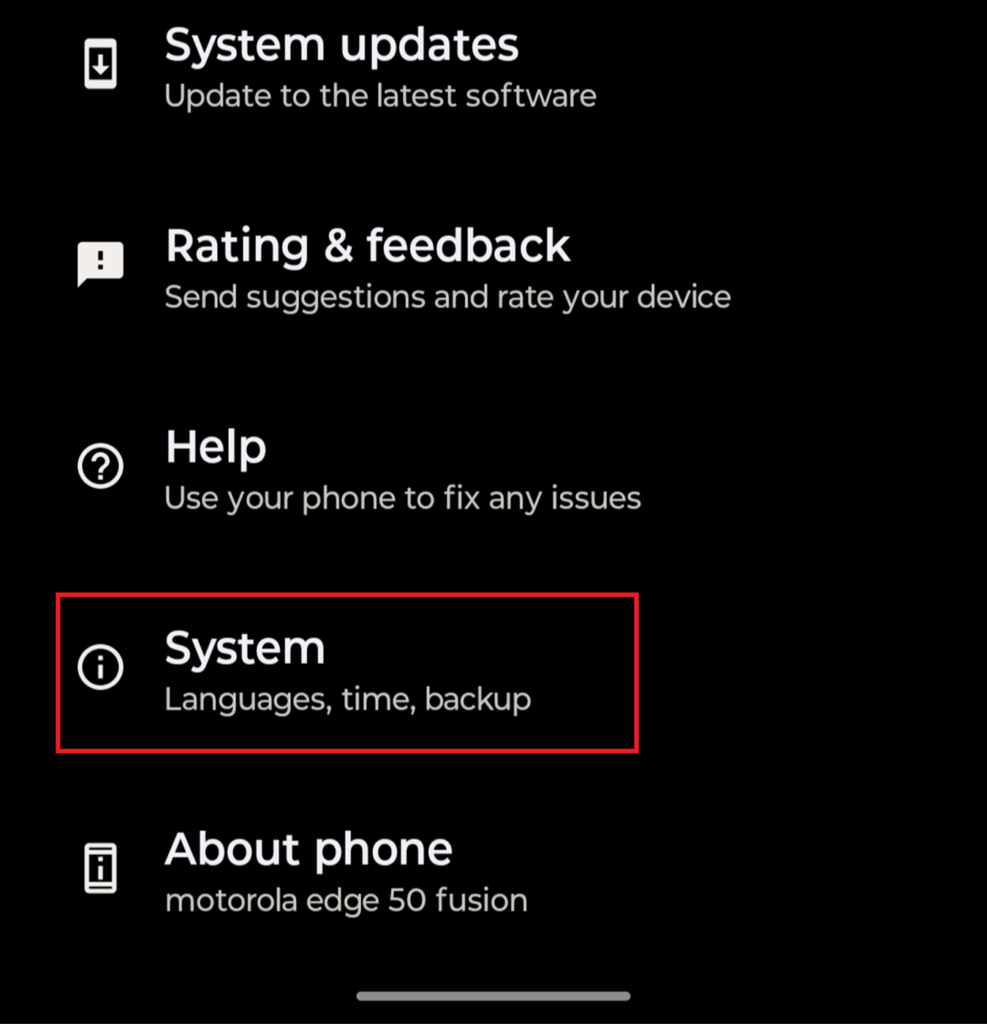
- Now, tap on Developer Options.
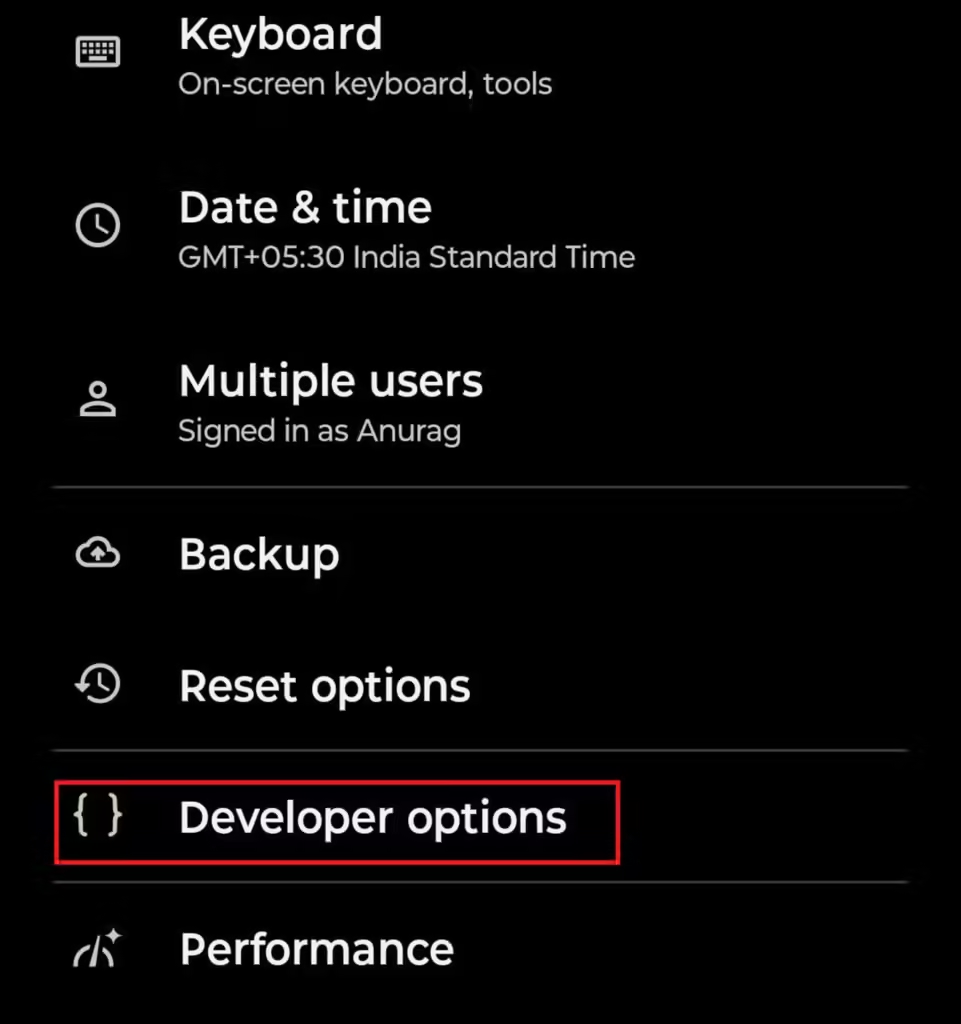
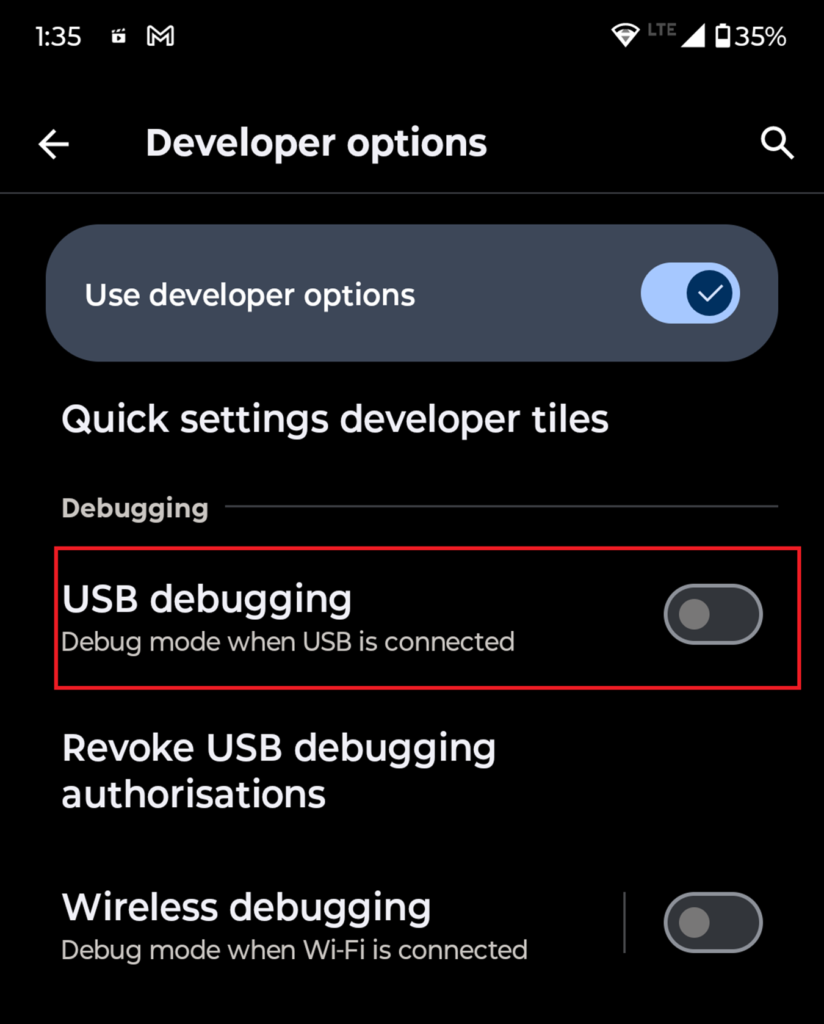
- Look for USB Debugging and enable the toggle next to it.
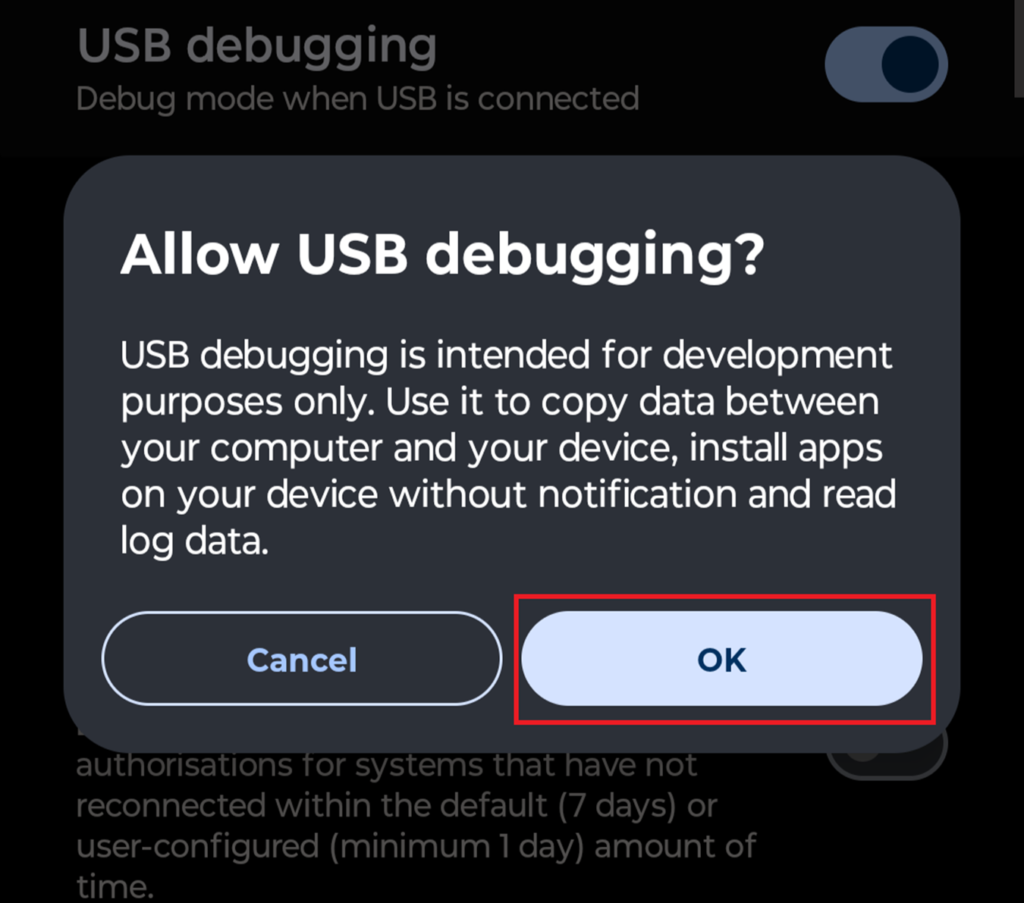
- In the confirmation prompt, tap on OK.
3. Download Update File
You will have to download the update file for your device to install the update through the ADB method. Here are some links from where you can download the update file for your device:
Some brands don’t allow downloading official firmware updates, so you can use some third-party sources to download updates. The links we have mentioned above are the official links to download updates.
If you want to update the custom ROM on your device, then you will have to go through the correct channel to download the update.
4. Rename Update File
Once you have downloaded the update file from the above steps, then you will have to rename it.
- Head over to File Explorer through the Windows + E key combo.
- On the left pane, click on the Downloads folder.

- Now, right-click on the update file, and click on Rename.
- Rename the file to update.zip so it’s easier to install.
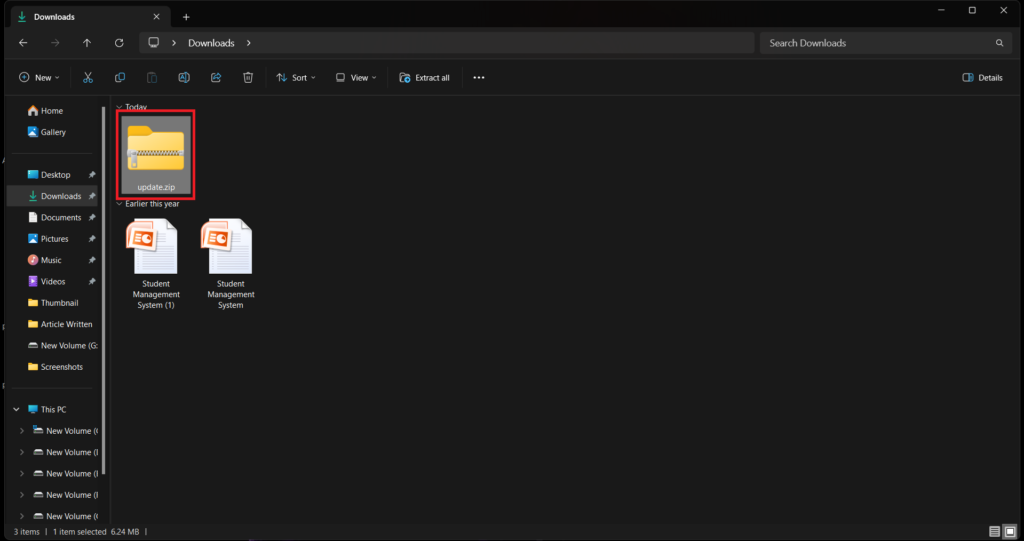
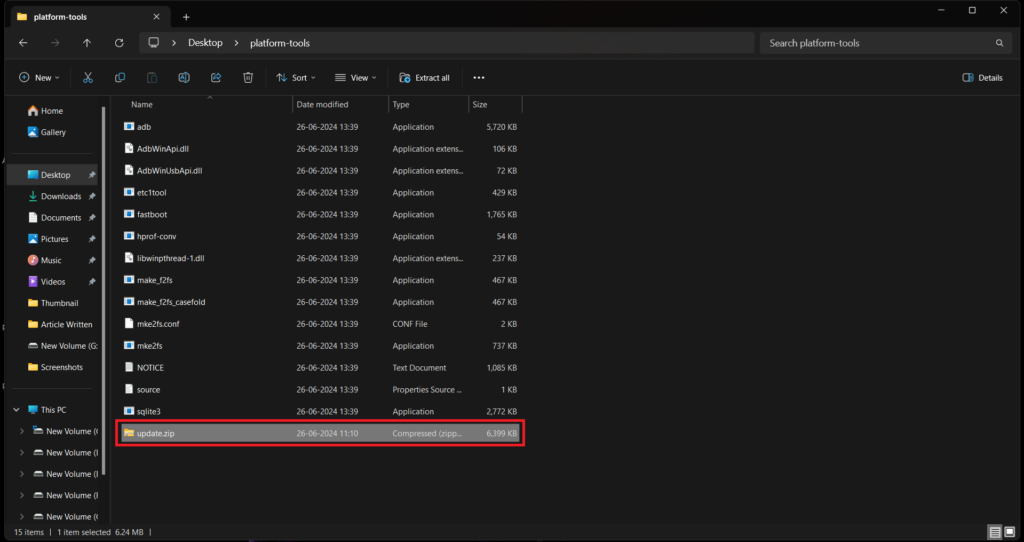
After this, move the update.zip file to the platform-tools folder (that you moved to the Desktop).
5. Reboot in Recovery Mode
Once you have all the files required and SDK platform tools are set up, you will have to establish the ADB connection and reboot your phone in recovery mode. Here’s how:
- Connect your phone to your PC using the USB cable.
- You will be given the option to allow USB Debugging, tap on Allow.
- Now, open the platform-tools folder from the desktop.
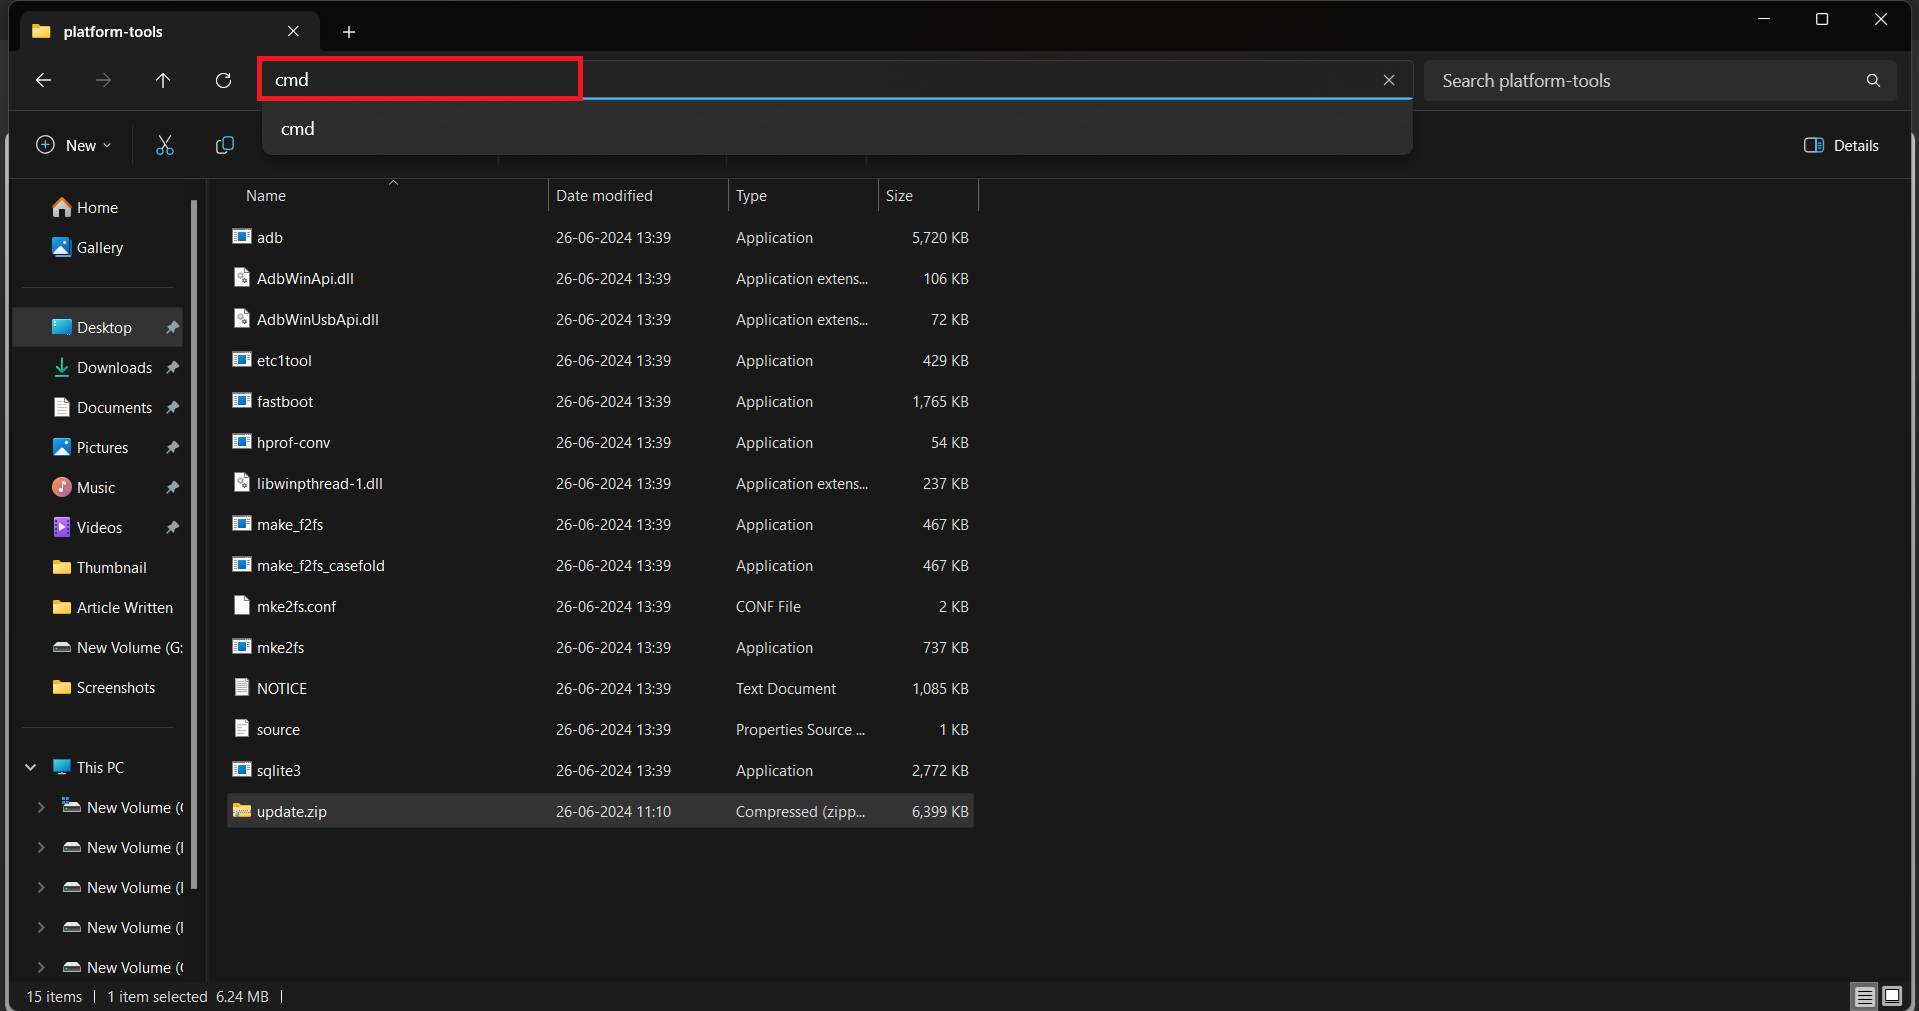
- Inside the folder, click on the address bar at the top, type CMD and press Enter. This will open the Command Prompt within that folder.
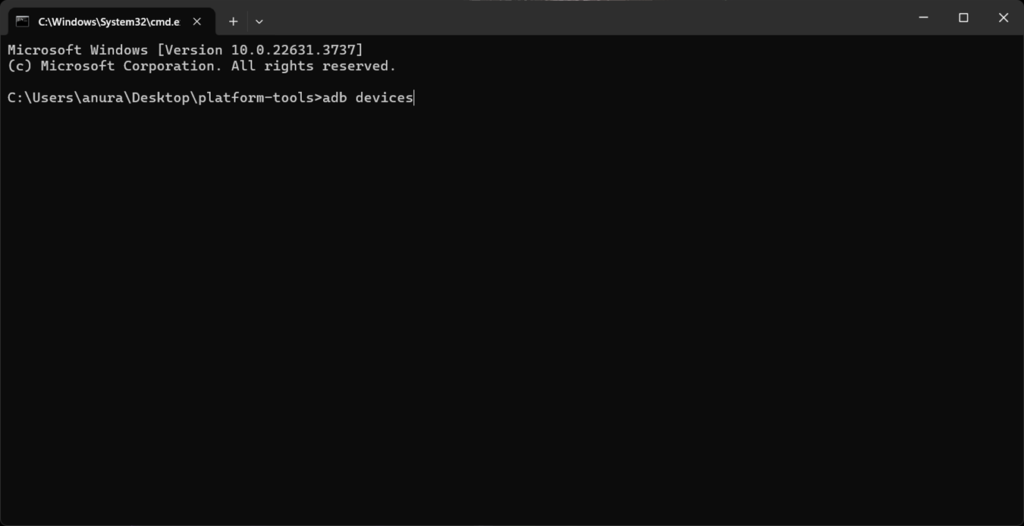
- After this, execute the following command-
- The above command should show the phone’s serial number. If you see the serial number, then this means the device is successfully connected.
- Now, reboot your device in recovery mode using the following command-
adb devices
adb reboot recovery
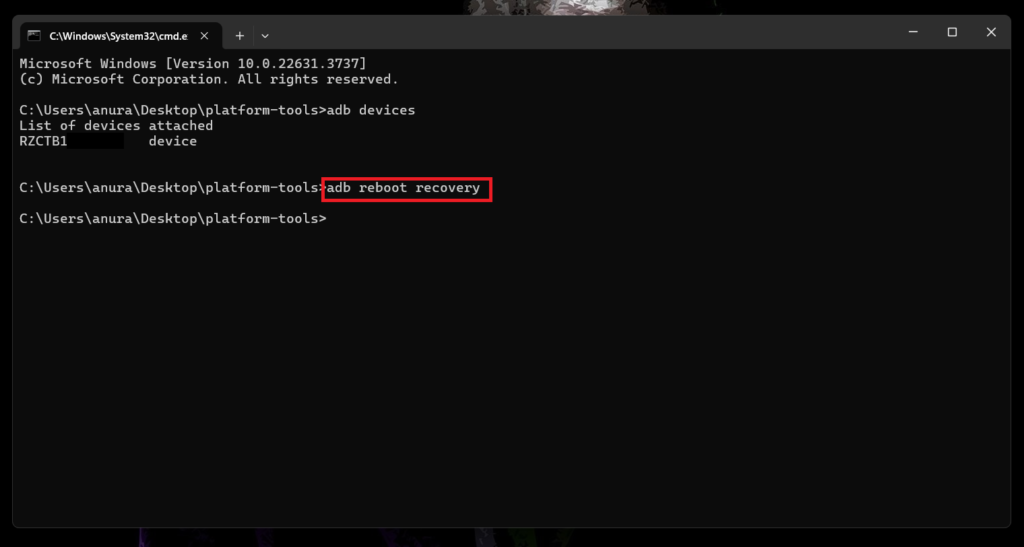
- This should boot your phone in recovery mode. If it is stuck on the No Command screen, then press and hold the Power button. While holding the Power button, press and hold the Volume Up key. Release both the buttons to reboot into recovery mode.
6. Install Update From ADB
After your phone is in recovery mode, you can follow the steps given below to update the phone from ADB:
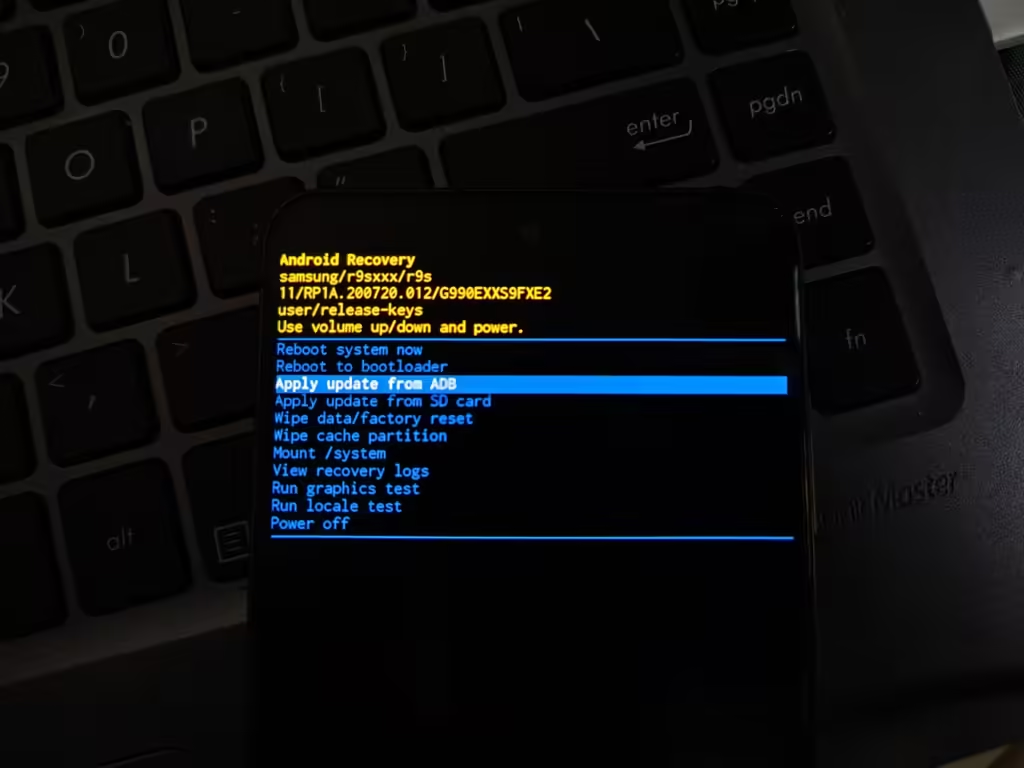
- Use the Volume Buttons to highlight Apply Update from ADB and press the Power Key to select this option.
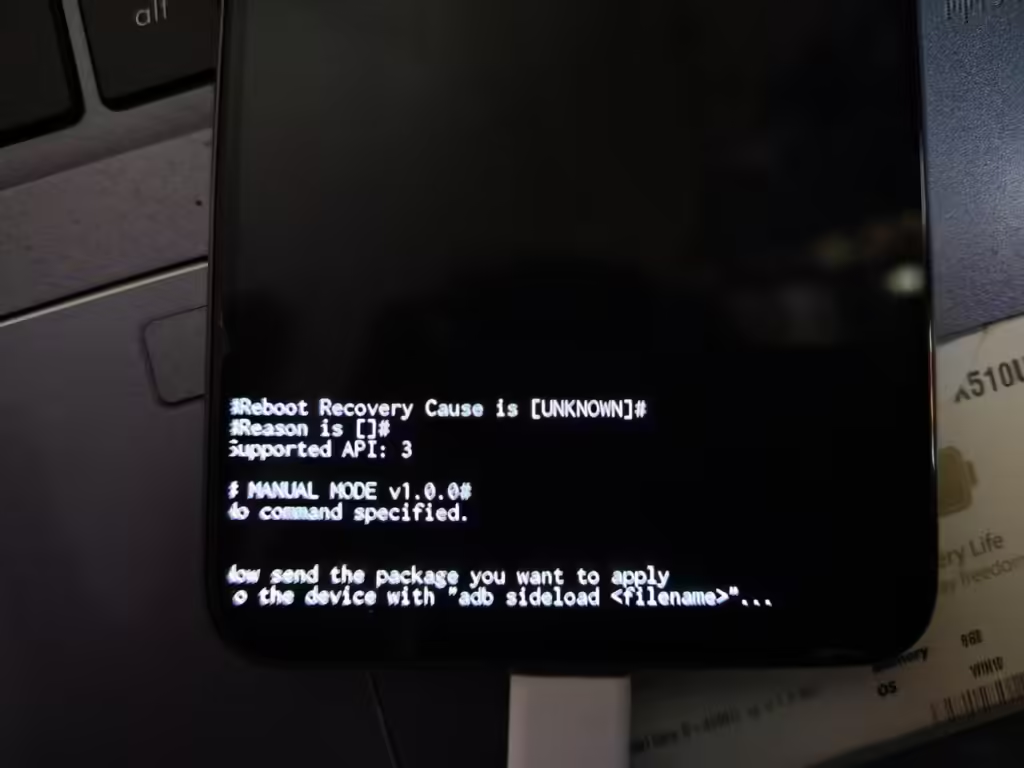
- You will be asked to send the update package to your device.
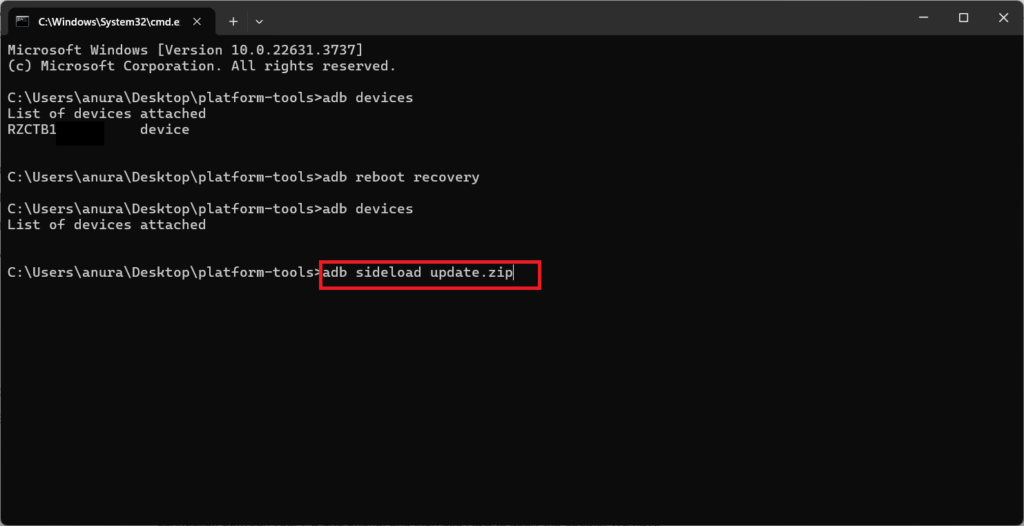
After this, execute the following command to update the device-
- adb sideload update.zip
- Wait for the update to get installed, and once done you will be headed to the Recovery screen on your phone.
- Highlight the Reboot System Now option using the Volume button and press the Power key to select it.
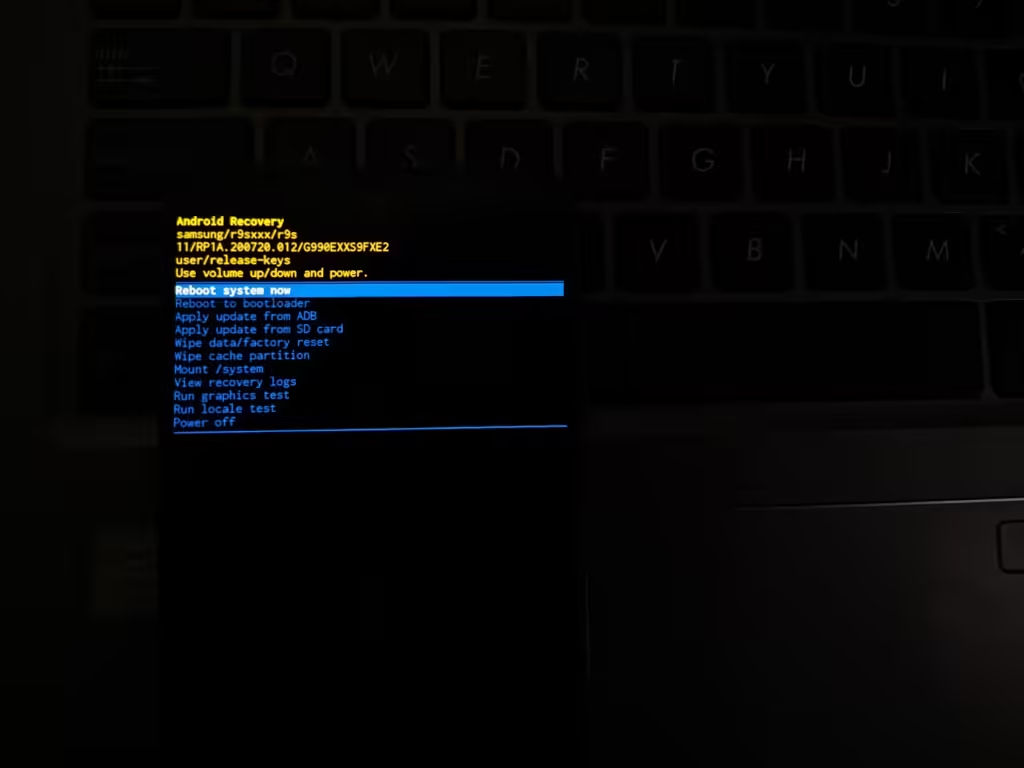
This should install the update from the ADB through the ZIP file you have.
Bottom Line
Installing an update from ADB not only lets you bypass the boot loop issue but you can also get the latest update even though it is not available through OTA update. However, this method is not as simple as the OTA update method as you need to get the correct update file, establish a connection between your PC and phone, and then use ADB to apply the update. We have crafted the complete guide around this, so you can follow it to apply updates from ADB.


Leave a Comment
You must be logged in to post a comment.