Social Technology

How to fix Autoconfiguration IPv4 Address issue Windows Server

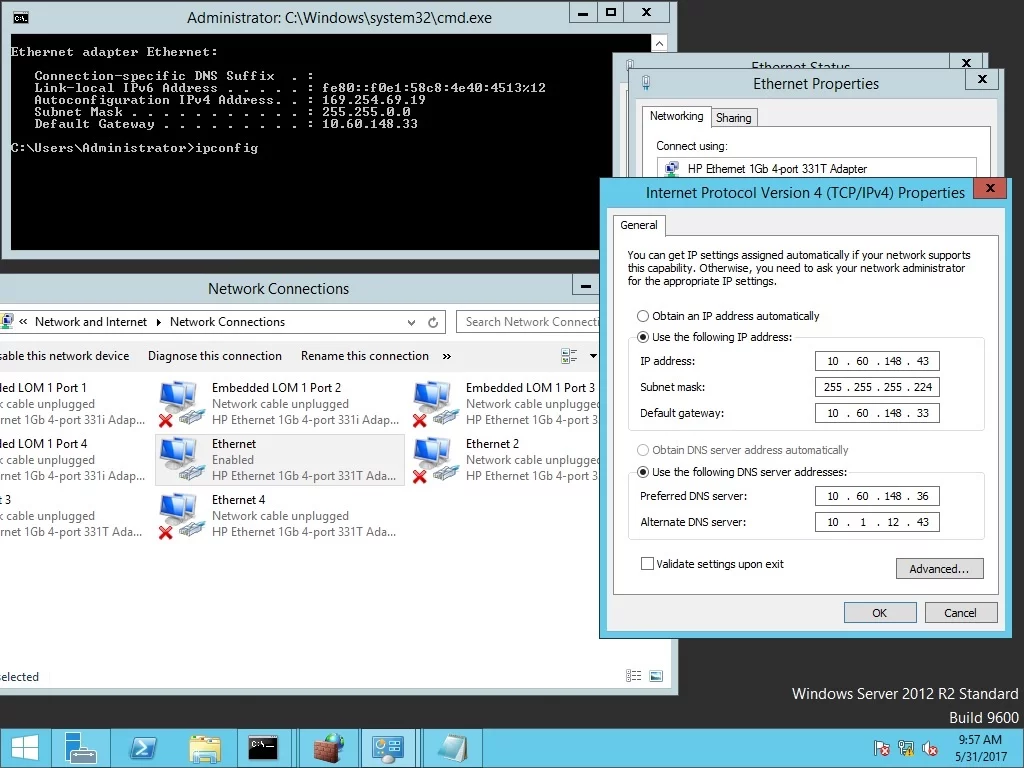
Today when i install Windows Server 2012 r2 OS in a new HPE Proliant DL 380 server, after the os installation i have added ip manually to the Ethernet interface, but i get a Limited Access error,so i double check the ip is correct or not, i was right ip is correct, so i disabled firewall ,then i checked by typing ipconfig in the command prompt and i get result as follows

Ethernet adapter Ethernet:

Connection-specific DNS Suffix . :
Description . . . . . . . . . . . : HP Ethernet 1Gb 4-port 331T Adapter
Physical Address. . . . . . . . . : 3C-A8-2A-F3-CF-9C
DHCP Enabled. . . . . . . . . . . : No
Autoconfiguration Enabled . . . . : Yes
Link-local IPv6 Address . . . . . : fe80::f0e1:58c8:4e40:4513%12(Preferred)
IPv4 Address. . . . . . . . . . . : 10.60.148.43(Duplicate)
Subnet Mask . . . . . . . . . . . : 255.255.255.224
Autoconfiguration IPv4 Address. . : 169.254.69.19(Preferred)
Subnet Mask . . . . . . . . . . . : 255.255.0.0
Default Gateway . . . . . . . . . : 10.60.148.33
DNS Servers . . . . . . . . . . . : 10.60.148.36
10.1.12.43
NetBIOS over Tcpip. . . . . . . . : Enabled

as you can see there is two ipv4 ip’s , one is the ip which i given , second is APIPA range ip

to fix this please follow the steps

  1. Click on start and click on RUN (or simple press windowsKey+R ) type CMD
  2. type ipconfig

this is will give you following result

Ethernet adapter Ethernet:

Connection-specific DNS Suffix . :
Description . . . . . . . . . . . : HP Ethernet 1Gb 4-port 331T Adapter
Physical Address. . . . . . . . . : 3C-A8-2A-F3-CF-9C
DHCP Enabled. . . . . . . . . . . : No
Autoconfiguration Enabled . . . . : Yes
Link-local IPv6 Address . . . . . : fe80::f0e1:58c8:4e40:4513%12(Preferred)
IPv4 Address. . . . . . . . . . . : 10.60.148.43(Duplicate)
Subnet Mask . . . . . . . . . . . : 255.255.255.224
Autoconfiguration IPv4 Address. . : 169.254.69.19(Preferred)
Subnet Mask . . . . . . . . . . . : 255.255.0.0
Default Gateway . . . . . . . . . : 10.60.148.33
DNS Servers . . . . . . . . . . . : 10.60.148.36
10.1.12.43
NetBIOS over Tcpip. . . . . . . . : Enabled

now type below code in the command prompt

netsh interface ipv4 show inter

this will show you below resurlt

C:\\Users\\Administrator>netsh interface ipv4 show inter

Idx     Met         MTU          State                Name

—  ———-  ———-  ————  —————————

  1          50  4294967295  connected     Loopback Pseudo-Interface 1

 12          10        1500  connected     Ethernet

 13           5        1500  disconnected  Embedded LOM 1 Port 1

 14           5        1500  disconnected  Ethernet 2

 15           5        1500  disconnected  Embedded LOM 1 Port 2

 16           5        1500  disconnected  Ethernet 3

 17           5        1500  disconnected  Ethernet 4

 18           5        1500  disconnected  Embedded LOM 1 Port 3

 19           5        1500  disconnected  Embedded LOM 1 Port 4

check for the connected interface

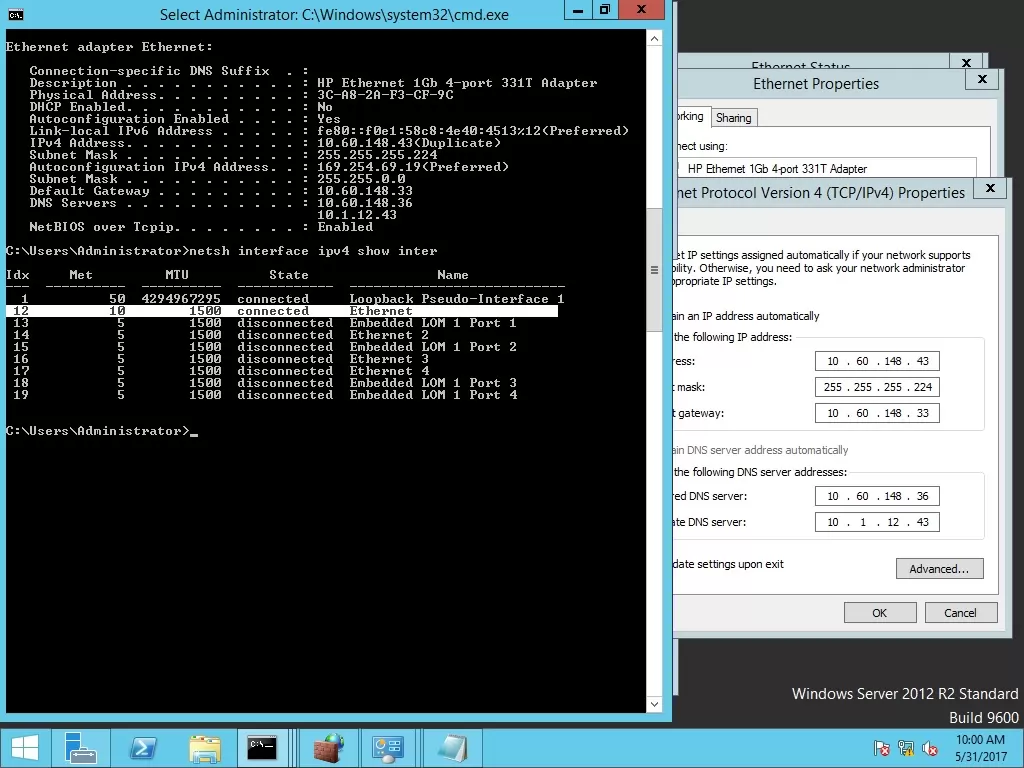
from the above command result you can find the connected interface notedown its idx id which is 12 in my case but your id may vary , type following command with your idx id in the command prompt then press enter

netsh interface ipv4 set interface 12 dadtransmits=0 store=persistent

this will give you following result

C:\\Users\\Administrator>netsh interface ipv4 set interface 12 dadtransmits=0 store=persistent

Ok.

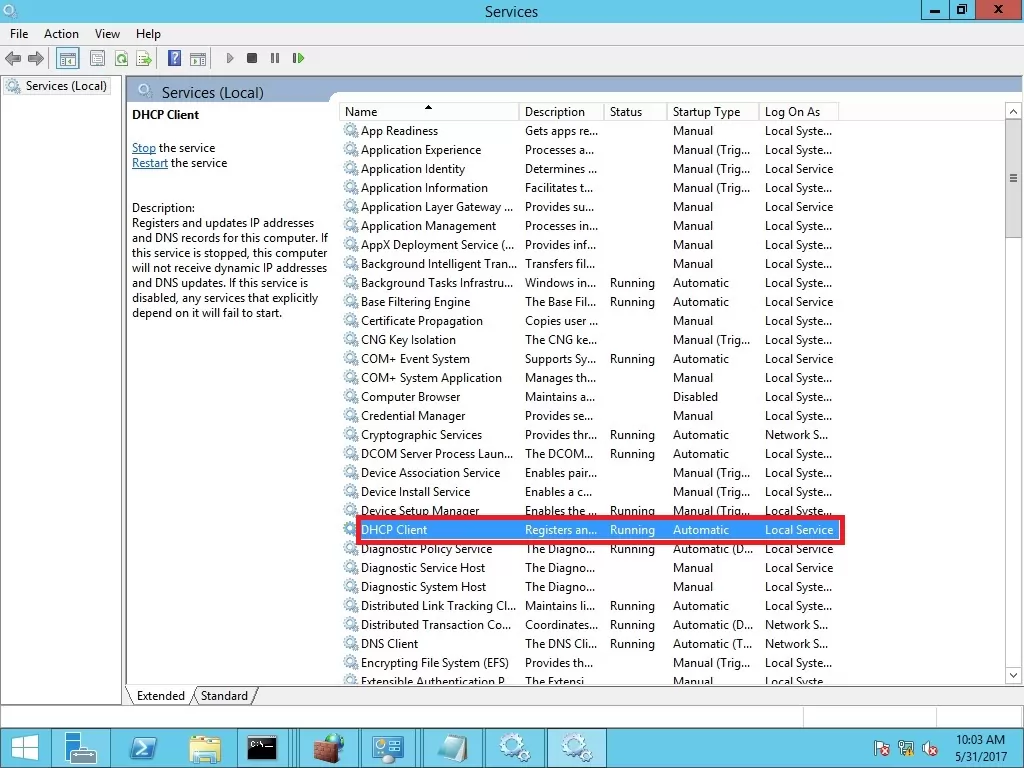
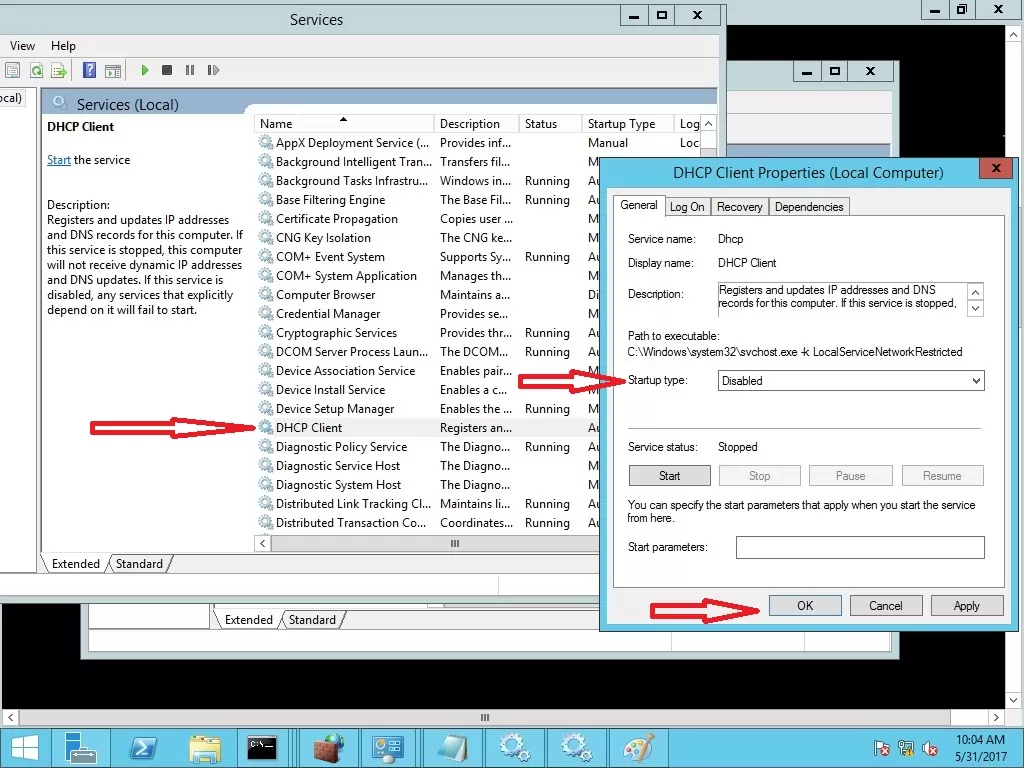
  1. Click on start and click on RUN (or simple press windowsKey+R ) type CMD and Type Services.msc a box will appear Search for DHCP client right click on it and Click on Properties click on Startup Type select Disable
  2. Now Click on Stop Button Below Andclick on Ok

Note

  1. Unplug Your Lan Cable And Restart your System
  2. After Restart don’t Plugin your Cable, Come again to Services.msc find DHCP client right click on it and Click on Properties click on Startup Type nowselect Automatic
  3. Click on Start button below and then Ok.
  4. Now Plugin your Lan Cable and Enjoy.

Leave a Comment